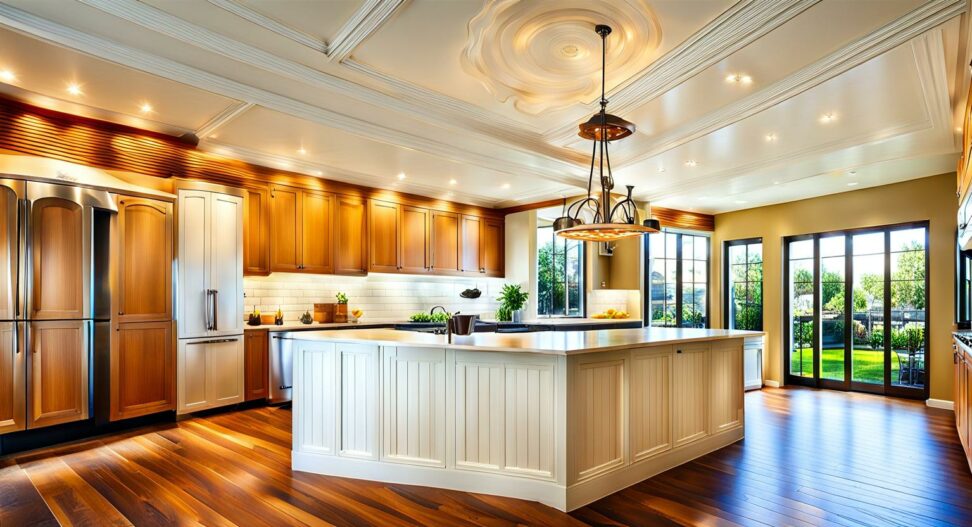
Add Depth to Your Kitchen with Eye-Catching Beadboard Ceiling Details
Kitchens are often the heart of a home, where friends and family gather to cook, eat and spend quality time together. However, many kitchens feature basic drywall or popcorn ceilings that do little to enhance the character of the space. By installing beadboard on your kitchen ceiling, you can add charming cottage vibes or a coastal flair that sets the tone for your culinary gathering spot.
With its distinctive stripes and vintage charm, few design choices can transform a kitchen quite like beadboard ceilings. The texture and natural beauty bring depth and style to even the most sterile, cookie-cutter kitchens. Let's explore the history of beadboard, the benefits it offers, and how to design an eye-catching beadboard ceiling in your own kitchen.
Beadboard's Rich History and Versatility
Beadboard dates back centuries as a practical and decorative building material used for both interior and exterior applications. The thin, grooved wooden planks were an economical way to add visual interest to walls, ceilings, cabinetry, and furniture.

Over the years, beadboard has been adapted in many ways while retaining its signature striped appearance. Originally made from pine, today's beadboard comes in poplar, oak, maple and other woods. There are even vinyl, PVC and other synthetic beadboard options that increase moisture resistance while mimicking the look of real wood.
Perfectly Suited for Kitchens
With its ability to add warmth and personality, beadboard is the ideal way to transform the vibe of your cooking space. The natural material provides a pleasing contrast to the hard edges and sleek finishes of most modern kitchen cabinets and stainless steel appliances.
Beyond just aesthetics, beadboard also offers acoustic and cooling properties that drywall lacks. The grooves help absorb sound and the tongue-and-groove construction allows better airflow. This can keep your kitchen feeling serene and comfortable.
Layout and Design Elements
When designing your beadboard ceiling, first decide between covering the entire surface versus using beadboard as an accent. Focusing on a central ceiling medallion draws the eye upwards and adds architectural interest.
Horizontal planks create clean lines while alternating directions in a zig-zag pattern makes more of a statement. Wider planks and deeper grooves convey a more dramatic look as well.
Incorporate additional trim, exposed wood beams, or crown molding to introduce pleasing contrasts. Be sure to factor in your ceiling height and windows when mapping out beadboard placement. Careful planning maximizes both aesthetics and natural daylight.
Material Selection for Your Vision
Pine has long been the traditional beadboard choice, valued for its affordability and ability to take paint or stain well. But you can also explore options like poplar for a light and airy look or oak for added durability.
Painted beadboard lends a more refined, polished look, especially in classic white. For a more rustic character, opt for a rich wood stain that highlights the grain patterns. Espresso, gray and black stained beadboard offer sophisticated contrast.
Don't forget to complement with other natural textures like exposed brick, textured tiles or hardwood flooring. This adds depth while allowing the beadboard to shine as the crowning jewel.
Incorporate Lighting and Accessories
Proper illumination ensures your beadboard ceiling gets admired. Recessed can lights are ideal, casting a glow to accentuate the depth and detail of each plank. Wire-mounted pendant lights over islands or dining tables also provide attractive task lighting.
If adding ceiling fans or skylights, carefully incorporate into the beadboard design flow. Warm metal finishes like oil-rubbed bronze or brass help vintage-style beadboard feel on-trend and current.
Achieving a Flawless Beadboard Installation
While specialized skills are required for a seamless beadboard ceiling, many DIYers can tackle it with proper planning. Accuracy is key, as there's little margin for error once boards are in place.
Plan the Layout
Start by measuring your ceiling space and doorway openings if any span the kitchen. Calculate the square footage and material needs based on plank sizes. Draft an installation map indicating plank direction and any lighting or vents.
Mark plumb lines with a laser level to guide the first row. This ensures a straight, professional look. Leave room for trim pieces to finish outer edges.
Prep the Ceiling
Remove any existing ceiling material if necessary. Install furring strips on ceilings that are uneven. This provides a level base to nail beadboard to. Thoroughly clean the ceiling surface.
Prime ceiling areas where needed so the adhesive can bond tightly. Use a quality construction adhesive for strength and longevity.
Install the Beadboard Planks
Use your plumb lines as a guide to precisely position the first row. This will set the direction for remaining rows. Nail the beadboard into ceiling joists or furring strips every 6-12 inches.
Stagger end joints to avoid obvious seams. Apply adhesive between each row for stability and use painter's tape to hold planks temporarily.
Fill any cracks or gaps wider than 1/8 inch with wood putty before sanding down high spots. Use trim to conceal larger gaps.
Finish with Paint or Stain
Lightly sanding helps achieve a smooth, consistent finish. Prime boards before painting if desired. Apply two to three coats of your chosen stain or paint for full coverage and protection.
Caulk along ceiling edges, crown molding, light fixtures and vents for a polished look. Touch up paint as needed.
The right ceiling can truly make or break a kitchen's style. Unlike basic drywall, beadboard infuses vintage charm into even the most cookie-cutter spaces. Your kitchen transitions from boring to brilliant with this special touch.
With proper planning and some elbow grease, you can install a beadboard ceiling yourself. Take inspiration from the coastal cottages and farmhouse kitchens graced by this humble yet captivating material. Achieve that welcoming, Down-to-earth feel in your own home with beadboard's distinctive stripes.