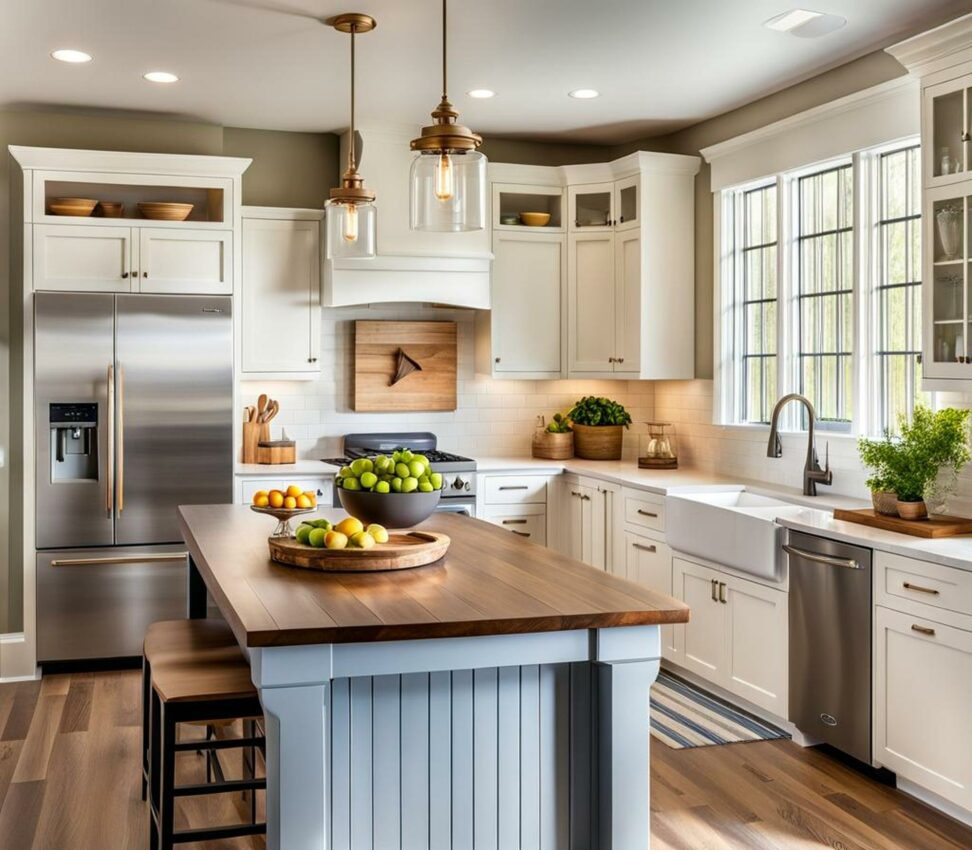
Give Your Kitchen a Made-Over Look with a Shiplap Island Makeover
Is your kitchen island looking tired and dated? Do you dream of giving it a fresh, modern farmhouse style makeover? Adding shiplap to your existing island can transform it affordably and easily for a handmade rustic look that's trending.
With a smooth yet visually textured appearance, shiplap offers depth and character to any surface. Read on to discover how this reclaimed wood can revive your kitchen island aesthetically and functionally.
Why Add Shiplap to Your Kitchen Island?
Made of grooved, interlocking wooden boards, shiplap provides a distressed, vintage vibe with beautifully imperfect seams. It has gained major popularity in home decor, appearing on walls, ceilings and furniture in many Fixer Upper style homes. Using shiplap to cover your existing island frame refreshes it with rustic farmhouse charm and artisanal craftsmanship.

Aside from its attractive reclaimed wood aesthetic, shiplap offers these benefits for kitchen islands:
- Conceals flaws, damage or an outdated style
- Adds visual texture and dimension
- Farmhouse style brings warmth to modern kitchens
- Relatively affordable DIY project
Planning Your Shiplap Kitchen Island Project
Careful planning ensures your shiplap island project goes smoothly. Follow these steps to design and prepare for installation.
Determine Your Design
First, decide on the overall look and orientation of your shiplap island. Neutral colors like white, light gray and soft blue complement shiplap's natural wood tones. Incorporate additional farmhouse accents like exposed beams, industrial pendant lights or an apron-front sink to extend the theme. Arrange your shiplap boards horizontally, vertically or in an artistic geometric pattern.
Gather Supplies
You'll need the following supplies to complete your DIY shiplap island project:
- Shiplap boards - reclaimed or new pine, cedar or other wood
- Construction adhesive
- Finish nails and nail gun
- Wood filler
- Sandpaper
- Trim boards for edges
- Paint/stain and supplies (optional)
Prep the Island
Proper prep ensures shiplap adheres smoothly:
- Remove existing countertop
- Repair or replace any damaged cabinets
- Thoroughly sand and clean the island base
Installing Shiplap on Your Island
Once prepped, you're ready to install. Follow these steps carefully for best results:
Measure Precisely
Account for overhang space and room for trim boards in your measurements. Cut each board slightly larger than needed.
Cut Boards to Fit
Remember to allow for the width of the grooves when cutting boards. Rip boards to the ideal width with a table saw.
Adhere Boards
Apply adhesive in a zig-zag pattern over the surface, then firmly press shiplap boards into place. Use finish nails every 12 inches, nailing through the grooves to conceal holes.
Fill Holes and Finish
Fill any visible nail holes with wood filler matched to your shiplap color. Once filler dries, sand boards smooth. Seal and paint or stain as desired.
Add Edge Trim
Install trim boards around the perimeter to finish it off. Mitre edges at corners and ensure consistent spacing between boards and trim.
Design Ideas for a Shiplap Kitchen Island
Get creative with your shiplap island design. Here are some stylish ideas to inspire you:
Mix and Match Colors
Go for bold contrast with a white island base and dark shiplap boards. Or choose earthy green shiplap for cohesion with natural wood cabinetry.
Vary Board Orientation
Horizontal boards give a traditional cottage look. Diagonal or herringbone patterns add modern geometric flair.
Include Open Shelving
Incorporate airy open shelving over the shiplap island to balance the rustic texture while displaying lovely dishes.
Incorporate Other Textures
Pair shiplap with a smooth butcher block countertop and rustic stone base cabinets for eclectic style.
Keep your shiplap island looking its best by:
- Dusting and cleaning it frequently
- Re-sealing the wood every 2 years
- Using cutting boards and trivets to protect from damage
Bringing a handcrafted, artisanal look to your kitchen, shiplap offers an easy and relatively affordable way to give a dated island a farmhouse facelift. With proper planning and installation, you can DIY a textured, rustic shiplap island that looks professionally designed.