Level Up Your Kitchen Style with Easy Beadboard Backsplash
Is your kitchen looking a little dull and dated? Do you dream of giving it a stylish facelift, but don't have the budget for a full-scale renovation? Transforming your kitchen's look can be simple and affordable with one strategic upgrade - installing a beadboard backsplash.
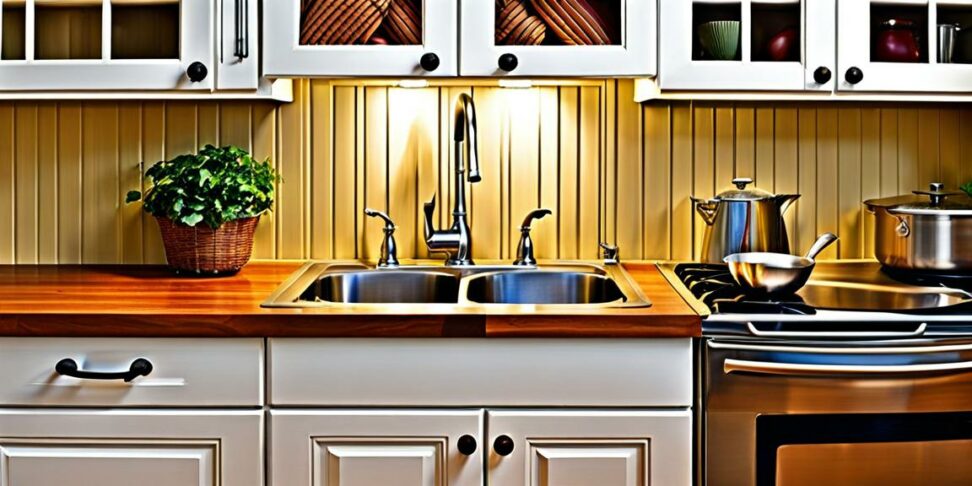
Beadboard backsplashes provide vintage farmhouse charm on a budget. The distinctive wooden planks with decorative grooves create visual interest and texture behind kitchen counters. A beadboard backsplash is an easy weekend project that instantly livens up your cooking space. Read on to learn all about beadboard, from the benefits to DIY installation tips.
What is Beadboard?
Beadboard refers to thin, grooved wooden planks traditionally used for interior wall and ceiling paneling. The distinctive narrow boards feature small, parallel ridges carved into the wood's surface. This creates a distinctive striped texture and chic cottage aesthetic.

Beadboard offers TIMELESS appeal reminiscent of charming old farmhouses and cottages. It brings warmth and vintage character to any room. While often associated with walls and ceilings, beadboard also makes an excellent backsplash material. The decorative wooden finish softens and adds life to kitchens.
Beadboard vs. Shiplap
Shiplap is another popular wood paneling option with a similar vintage style. However, shiplap consists of solid, flat-edged wooden boards with exposed seams. The overlapping planks create bold lines compared to beadboard's more subdued striped texture.
While both create RUSTIC ambiance, shiplap's wider planks and visible seams provide more dramatic contrast. Beadboard offers a more nuanced, refined aesthetic for those seeking soft cottage charm.
Why Choose Beadboard for Your Kitchen Backsplash?
Affordable Kitchen Update
One of the best reasons to consider beadboard is its affordability. At approximately $3-5 per square foot, beadboard provides charming style on a budget. Tiling a backsplash can cost anywhere from $5 to $50 per square foot depending on the tile material. In contrast, you can add gorgeous beadboard to a 10x4 foot area for well under $200.
Since you don't need to replace cabinets or counter tops, adding beadboard backsplash is an inexpensive way to refresh the look of your kitchen. Minor changes can make a major visual impact.
Easy Weekend DIY Project
Installing a beadboard backsplash is a DIY-friendly project easily accomplished in a weekend. The installation process is straightforward with minimal tools required. All it takes is some simple cutting, fitting, nailing and adhesive.
With beadboard, there is no need to cut tiny tiles or deal with complicated grout lines. The large planks make the project more manageable for HOMEOWNERS looking to upgrade their kitchen's style without professional help.
Farmhouse Style on a Budget
Nothing imparts cozy farmhouse flair quite like white beadboard. The distressed wooden planks evoke pastoral charm and warmth. Beadboard adds vintage sensibility without undertaking a full kitchen remodel.
Painted white, beadboard perfectly complements other cottage elements like open shelving, apron-front sinks and pendant lighting. Bringing the homey APPEAL of a charming cottage kitchen is possible even on the most modest budget.
Planning Your Beadboard Backsplash
Selecting Materials
For kitchen installation, look for beadboard designed specifically for high-moisture INTERIOR areas. Standard boards are typically 6 inches tall and 4 feet long, with a tongue and groove edge for joining.
When calculating how much to purchase, add about 10% extra to account for imperfect cuts and mistakes. It's easier to return extra materials than come up short mid-project!
Gather Supplies
In addition to the beadboard itself, you'll need basic installation supplies like finish nails, construction adhesive, a stud finder, caulk and primer/paint. Useful tools include a tape measure, pencil, level, saw for cutting, and a nail gun or hammer.
Measure and Map Your Backsplash Area
Carefully measure the height and width of the backsplash area to determine the total square footage. Sketch a layout of the planks and mark where cuts will be needed. Use a stud finder to mark where you can securely nail into wall studs.
Installation Guide
Prepare the Wall
Remove any existing backsplash and make sure the wall is smooth. Mark the stud locations for nailing. For the most secure installation, you'll want to nail into studs every 6-12 inches.
Cutting and Fitting Beadboard
Measure and mark each plank for any trimming needed to fit your space. Leave a small 1/8 inch gap between the beadboard planks. Use a saw to carefully cut the planks to size. Test the cut planks to ensure they fit neatly into position.
Affixing the Beadboard
Apply adhesive to both the back of the planks and directly onto the wall surface. Carefully nail the beadboard into the wall stud markings, keeping the planks evenly spaced and level. Caulk any gaps, let dry completely, then prime and paint for a bright white finish.
Achieving Farmhouse Style with Beadboard
Open Shelving and Farm Sinks
Complement your fresh beadboard backsplash by adding rustic farmhouse shelving flanking the range. Open shelving provides an airy, vintage look. An apron-front farmhouse sink continues the cozy cottage charm.
Exposed Beams and Pendant Lights
Add visual interest by installing faux ceiling beams. Wrought iron pendant lights over the kitchen sink also impart old-fashioned farmhouse flair. Opt for black metal fixtures for bold contrast against white beadboard.
Neutral Tones and Natural Materials
Let the beadboard be the star with a soothing neutral color scheme of whites, grays and beiges. Unfinished wood accents and small touches of greenery in the form of plants or botanical art prints keep the look relaxed and welcoming.
With its breezy cottage charm and budget-friendly price point, beadboard backsplash deserves consideration for any kitchen upgrade. Installing beadboard planks instantly livens up your cooking space with vintage farmhouse flair. With just a little planning and elbow grease, you can completely transform the look and feel of your kitchen in a weekend.
Beadboard backsplash is one of the most stylish and affordable ways to upgrade your kitchen. Let the warm, textured planks infuse your culinary space with rustic farmhouse beauty.