The Complete Guide to Installing and Finishing Kitchen Cabinet Trim
Updating the trim around kitchen cabinets is one of the easiest ways to give your space a fresh new look without a full remodel. The right trim styles and materials can completely transform ordinary cabinets.
We’ll cover planning and prep, cutting and securing the trim pieces, finishing techniques, and maintenance tips. Whether you’re a DIYer or want to educate yourself before hiring a pro, read on to learn the complete process from start to finish.
Planning Your Kitchen Cabinet Trim
The first step is deciding what trim styles and materials will work best for your kitchen cabinets and decor. Carefully planning out this phase will ensure you get the finished look you want.
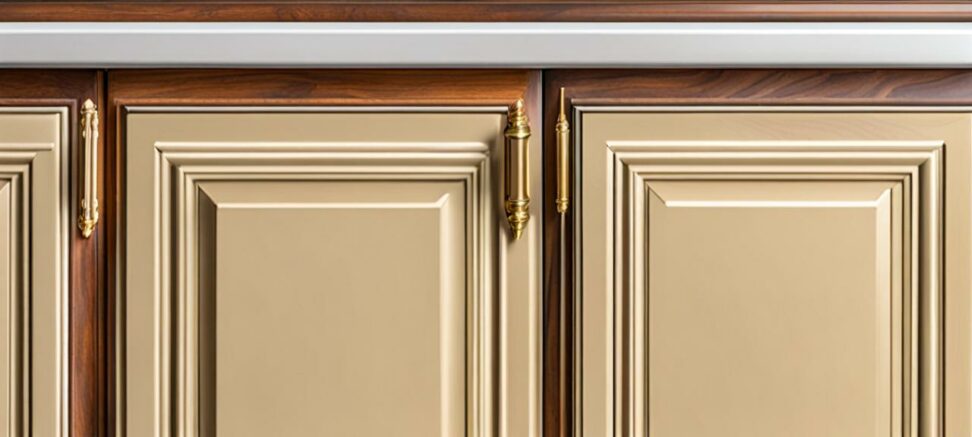
Choosing Trim Styles
Popular options for cabinet trim include:
- Baseboard trim along the floor to create a finished look.
- Crown molding at the top to add height and elegance.
- Accent trim like quarter round in corners or small decorative molding for visual interest.
Evaluate your existing cabinet style and kitchen layout to determine the best trim for your space. Simple shaker cabinets often look great with just baseboard trim, while more ornate cabinetry can be complemented by crown molding.
Trim Materials
Wood and MDF are classic trim materials to consider:
- Wood provides a rich, timeless look but requires careful installation and finishing to prevent swelling and warping.
- MDF is an affordable alternative material made from pressed wood fibers. It takes paint and stain well.
For a low maintenance option, moisture-resistant PVC or vinyl work especially well for kitchens. These plastic trim boards resist damage while providing a wood-like appearance.
Determine Amount Needed
Measure along the tops, bottoms, and sides of all your cabinets to calculate the linear footage needed. Factor in extra length for corners and ends that require miter cuts. Order your materials with a 10% overage to allow for mistakes and customization.
Prep Work for Installation
With your materials purchased, it’s time to start prepping for installation day. Gather supplies and tools and take steps to get your cabinets ready for new trim.
Gather Supplies
You’ll need:
- Trim boards
- Wood glue or adhesive
- Finish nails
- Caulk
- Wood filler
- Sandpaper
And tools like:
- Miter saw
- Table saw or circular saw
- Nail gun
- Drill
- Level
- Stud finder
- Clamps
Prepare the Cabinets
Remove any existing trim pieces with care to avoid damaging the cabinets. Fill any holes, gaps, or imperfections with wood filler and sand smooth. Use painter’s tape to protect cabinet surfaces from damage during installation.
Once prepped, your cabinets will be ready for fresh new trim!
Installing Kitchen Cabinet Trim
Installation is the most labor intensive part of the process, but goes smoothly with careful planning and precision.
Cutting Trim Pieces
Measure each run and mark your cuts on the trim boards. For corners, cut angles with a miter saw. Test fit all pieces before finalizing for a perfect fit.
Use a stop block clamped to your miter saw fence to ensure all the pieces are cut to exactly the same length for a consistent look.
Securing the Trim
There are a few options for attaching trim boards:
- For wood trim, use wood glue and finish nails driven into wall studs.
- Self-adhesive PVC trim can simply be peeled and stuck onto cabinet surfaces.
- Liquid nail adhesive provides a strong bond without nails.
Drive nails into wall studs whenever possible for a secure hold. Use a stud finder to locate them behind cabinet walls.
Filling Gaps and Seams
Wood filler and painters caulk will cover any imperfections:
- Use wood filler to patch nail holes and gaps on natural trim pieces before staining.
- On painted trim, apply painter's caulk into seams for a seamless look after painting.
Take time to properly fill and seal for best results.
Trimming Out Corners
For inside corners, carefully miter trim molding at a 45 degree angle. Test fit the mitered joint and use wood filler if needed to smooth gaps.
To finish outside corners, add separate quarter round trim pieces or small end caps.
Finishing Kitchen Cabinet Trim
Proper finishing transforms your trim installation into a beautiful, professional-looking element in your kitchen. Use these finishing techniques for a flawless end result.
Filling and Sanding
On natural wood trim:
- Fill all nail holes, gaps, and imperfections with wood filler.
- Once dry, sand trimmed areas smooth.
This prep allows the trim to take stain evenly.
Priming and Painting
For painted trim:
- Apply high-quality primer to seal surfaces.
- Paint with two finish coats of cabinet-grade enamel.
Priming ensures paint adheres evenly across all trim surfaces.
Staining Wood Trim
To stain trim:
- Wipe on wood conditioner so the stain absorbs evenly.
- Apply two coats of oil-based penetrating stain.
- Finish with a protective sealer or polyurethane.
This gives you rich, even color while preventing future damage.
Your new trim will keep looking fresh for years with simple maintenance:
- Dust trim weekly and clean with mild soap and water.
- Re-caulk edges if gaps appear to prevent moisture damage.
- Touch up paint nicks and scratches as soon as you notice them.
- Replace any pieces that become damaged beyond repair.
With proper care, your kitchen trim will remain beautiful and enhance your cabinets for years of enjoyment!